Introduction
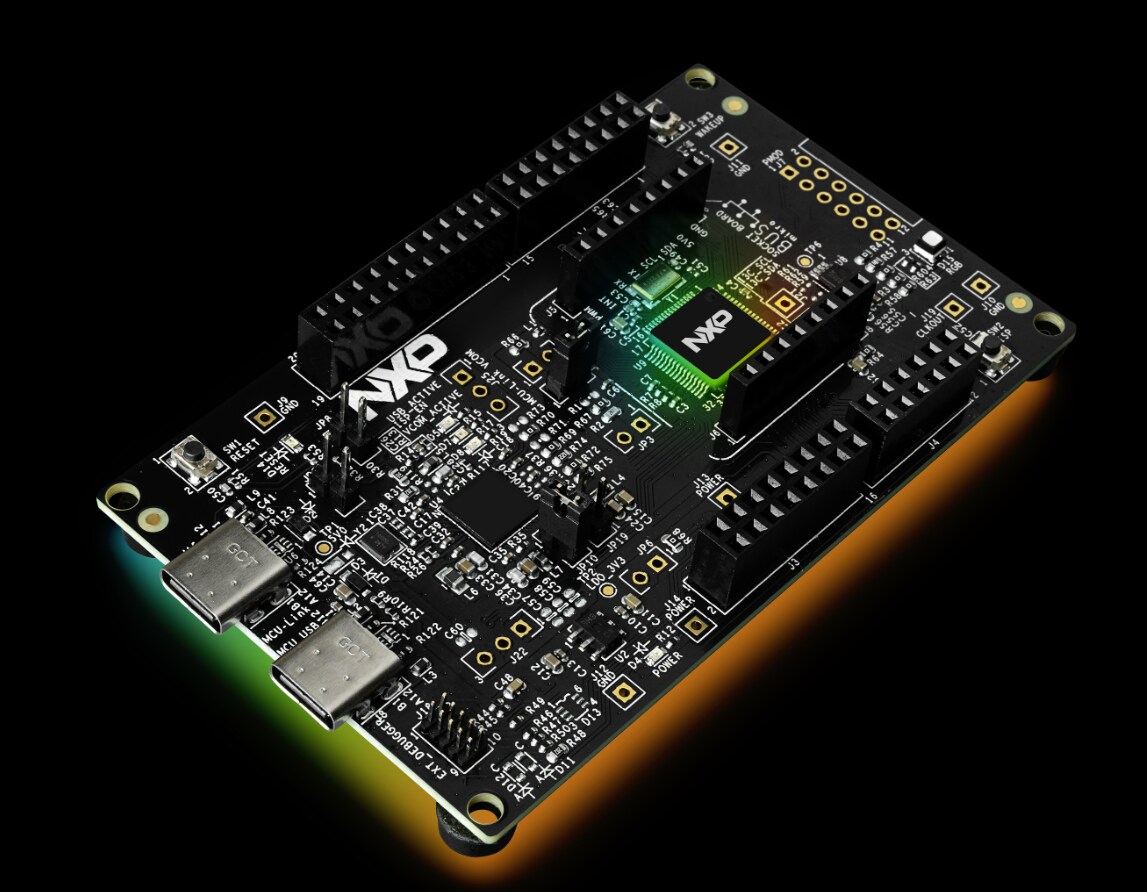
This hands-on video explains how to take a trained AI model and deploy it for NPU-accelerated inference using eIQ Neutron on the FRDM i.MX 95 PRO development board.
YOLOv8n is used as the example model. The video covers the complete workflow, including host setup, model export, calibration, INT8 quantization, Neutron compilation, board deployment, benchmarking, and troubleshooting.
By the End of This Training, You Will Be Able To
Understand the main components of the eIQ Neutron-S hardware and software stack.
Download and export a YOLOv8n model to TFLite.
Quantize the model to INT8 for Neutron NPU execution.
Compile the quantized model for the i.MX 95 target.
Review compiler statistics and determine which operations are delegated to the NPU.
Deploy the model, delegate, driver, and firmware to the board.
Run CPU and NPU benchmarks.
Compare inference latency and calculate the NPU speed-up.
Hardware and Prerequisites
Before starting the training, verify that you have the required development board, host system, network connection, model, calibration data, and software tools.
Development Board
FRDM i.MX 95 PRO development board.
NXP BSP LF6.18.20 2.0.0.
eIQ Neutron runtime compatible with Neutron SDK 3.2.1 or later.
TensorFlow Lite 2.19.0 benchmark application.
Ethernet or USB-CDC connectivity.
SSH and SCP access to the board.
Root access on the target system.
Linux Host Computer
Ubuntu 20.04 or Ubuntu 22.04 is recommended.
Python 3.8 or later.
Python virtual environment support.
SSH and SCP command-line tools.
Sufficient storage for the SDK, models, calibration images, and generated artifacts.
Watch the Complete Training Video
Watch the video from beginning to end and execute the commands in the presented order. Each stage generates an artifact required by the next stage.
Command Cheat Sheet
The following commands are organized in execution order. Replace placeholders such as <board-ip> with the values for your environment.
1. Download and Configure the Neutron SDK
# Extract the SDK archive
unzip eiq-neutron-sdk-linux-3.2.1.zip
# Enter the SDK directory
cd eiq-neutron-sdk-linux-3.2.1
# Add the SDK tools to PATH for the current terminal
export PATH="$PWD/bin:$PATH"
# Optional: make the PATH configuration persistent
echo 'export PATH="/path/to/eiq-neutron-sdk-linux-3.2.1/bin:$PATH"' >> ~/.bashrc
# Reload the shell configuration
source ~/.bashrc
# Verify the SDK tools
tflite-profiler --help
tflite-quantizer --help
neutron-compiler --help
2. Create the Python Environment
# Create a Python virtual environment
python3 -m venv .venv
# Activate the virtual environment
source .venv/bin/activate
# Upgrade pip
python3 -m pip install --upgrade pip
# Install the required packages
pip install generate-parameter-library-py \
ultralytics \
hf \
ai-edge-litert \
litert_torch \
numpy \
opencv-python
3. Download the YOLOv8n Model
# Download the trained YOLOv8n weights
hf download Ultralytics/YOLOv8 yolov8n.pt --local-dir .
# Verify the downloaded model
ls -lh yolov8n.pt
4. Export YOLOv8n to TFLite
# Export the PyTorch model to TFLite
yolo export model=yolov8n.pt format=tflite
# Locate the generated TFLite model
find . -name "*.tflite" -type f
# Update the following commands if your exported
# model uses a different file name or directory.
5. Download the COCO Calibration Dataset
# Create a directory for the calibration dataset
mkdir -p coco
cd coco
# Download the COCO training images
wget --no-check-certificate \
http://images.cocodataset.org/zips/train2017.zip
# Extract the images
unzip train2017.zip
# Return to the project directory
cd ..
# Verify the image directory
find ./coco/train2017 -type f -name "*.jpg" | head
6. Create the Calibration Conversion Script
Save the following script as jpg2bin.py . It converts the JPEG calibration images into raw binary tensors expected by the profiler.
#!/usr/bin/env python3
import argparse
import glob
import os
import random
import cv2
import numpy as np
def letterbox(image, new_shape=640, color=(114, 114, 114)):
height, width = image.shape[:2]
ratio = min(new_shape / height, new_shape / width)
resized_height = int(round(height * ratio))
resized_width = int(round(width * ratio))
resized = cv2.resize(
image,
(resized_width, resized_height),
interpolation=cv2.INTER_LINEAR,
)
canvas = np.full(
(new_shape, new_shape, 3),
color,
dtype=np.uint8,
)
top = (new_shape - resized_height) // 2
left = (new_shape - resized_width) // 2
canvas[
top:top + resized_height,
left:left + resized_width,
] = resized
return canvas
def main():
parser = argparse.ArgumentParser(
description="Convert JPEG images to YOLOv8n calibration tensors."
)
parser.add_argument(
"--images",
default="./coco/train2017",
help="Directory containing the calibration JPEG images.",
)
parser.add_argument(
"--out",
default="./calib_yolov8n",
help="Output directory for the binary tensors.",
)
parser.add_argument(
"--num",
type=int,
default=1000,
help="Maximum number of calibration images.",
)
parser.add_argument(
"--size",
type=int,
default=640,
help="Model input width and height.",
)
parser.add_argument(
"--shuffle",
action="store_true",
help="Shuffle the image list before selecting images.",
)
args = parser.parse_args()
os.makedirs(args.out, exist_ok=True)
files = sorted(
glob.glob(os.path.join(args.images, "*.jpg"))
)
if args.shuffle:
random.seed(0)
random.shuffle(files)
files = files[:args.num]
if not files:
raise RuntimeError(
f"No JPEG images were found in {args.images}"
)
for index, file_path in enumerate(files):
image = cv2.imread(file_path)
if image is None:
print(f"Skipping unreadable image: {file_path}")
continue
# Convert BGR to RGB.
image = cv2.cvtColor(image, cv2.COLOR_BGR2RGB)
# Letterbox resize to 640 x 640.
image = letterbox(image, args.size)
# Convert to float32 and normalize to [0, 1].
tensor = image.astype(np.float32) / 255.0
# Add batch dimension.
# Final layout: 1 x 640 x 640 x 3, NHWC.
tensor = np.expand_dims(tensor, axis=0)
output_path = os.path.join(
args.out,
f"calib_{index:05d}.bin",
)
tensor.tofile(output_path)
print(
f"Calibration tensors written to: {args.out}"
)
if __name__ == "__main__":
main()
# Make the script executable
chmod +x jpg2bin.py
# Generate up to 1000 calibration tensors
python3 jpg2bin.py \
--images ./coco/train2017 \
--out ./calib_yolov8n \
--num 1000 \
--size 640 \
--shuffle
# Count the generated binary files
find ./calib_yolov8n -type f -name "*.bin" | wc -l
# Check the size of a generated tensor
ls -lh ./calib_yolov8n | head
7. Inspect the TFLite Input and Output Tensors
python3 - <<'PY'
from ai_edge_litert.interpreter import Interpreter
model_path = "yolov8n.tflite"
interpreter = Interpreter(model_path=model_path)
interpreter.allocate_tensors()
print("Input details:")
for tensor in interpreter.get_input_details():
print(tensor)
print("\nOutput details:")
for tensor in interpreter.get_output_details():
print(tensor)
PY
Record the exact input tensor name reported by the model. Replace serving_default_args_0 in the profiling command if your model uses a different name.
8. Profile the Floating-Point TFLite Model
# Replace serving_default_args_0 if the model
# reports a different input tensor name.
tflite-profiler \
--input yolov8n.tflite \
--dataset serving_default_args_0,calib_yolov8n \
--output yolov8n_profile.csv
# Verify that the profiling CSV was generated
ls -lh yolov8n_profile.csv
# Preview the beginning of the profile
head yolov8n_profile.csv
9. Quantize the Model to INT8
# Generate the INT8 TFLite model
tflite-quantizer \
--input yolov8n.tflite \
--profile yolov8n_profile.csv \
--output yolov8n_quant.tflite
# Compare the model file sizes
ls -lh yolov8n.tflite yolov8n_quant.tflite
10. Verify the Quantized Model
python3 - <<'PY'
from ai_edge_litert.interpreter import Interpreter
model_path = "yolov8n_quant.tflite"
interpreter = Interpreter(model_path=model_path)
interpreter.allocate_tensors()
print("Quantized input details:")
for tensor in interpreter.get_input_details():
print("Name:", tensor["name"])
print("Shape:", tensor["shape"])
print("Data type:", tensor["dtype"])
print("Quantization:", tensor["quantization"])
print()
print("Quantized output details:")
for tensor in interpreter.get_output_details():
print("Name:", tensor["name"])
print("Shape:", tensor["shape"])
print("Data type:", tensor["dtype"])
print("Quantization:", tensor["quantization"])
print()
PY
11. Compile the Model for the Neutron NPU
# Compile the INT8 model for the i.MX 95 Neutron NPU
neutron-compiler \
--input yolov8n_quant.tflite \
--output yolov8n_neutron.tflite \
--target imx95
# Verify the generated model
ls -lh yolov8n_neutron.tflite
Generate Compiler Statistics
# Generate compiler and delegation statistics
neutron-compiler \
--input yolov8n_quant.tflite \
--output yolov8n_neutron_stats.tflite \
--target imx95 \
--dump-statistics
# Review the compiler output and record:
# 1. Number of delegated nodes
# 2. Number of CPU fallback nodes
# 3. Unsupported operators
# 4. Generated NeutronGraph partitions
Create a Profiling Build
# Compile a profiling-enabled model
neutron-compiler \
--input yolov8n_quant.tflite \
--output yolov8n_neutron_prof.tflite \
--target imx95 \
--use-profiling
# Verify all generated models
ls -lh yolov8n_quant.tflite \
yolov8n_neutron.tflite \
yolov8n_neutron_prof.tflite
12. Configure the Board IP Address
# Replace the example address with the board IP address
export BOARD_IP="192.168.1.100"
# Verify network connectivity
ping -c 4 "$BOARD_IP"
# Test the SSH connection
ssh root@"$BOARD_IP"
13. Create the Deployment Directory
# Create the working directory remotely
ssh root@"$BOARD_IP" \
"mkdir -p /root/neutron_demo"
14. Copy Runtime Artifacts to the Board
The driver, delegate, and firmware may already be included in the BSP. Copy them only when the required or matching versions are not already installed.
# Copy the Neutron driver
scp libNeutronDriver.so \
root@"$BOARD_IP":/lib/
# Copy the Neutron delegate
scp libneutron_delegate.so \
root@"$BOARD_IP":/usr/lib/
# Copy the Neutron firmware
scp NeutronFirmware.elf \
root@"$BOARD_IP":/lib/firmware/
# Copy the plain INT8 model for the CPU baseline
scp yolov8n_quant.tflite \
root@"$BOARD_IP":/root/neutron_demo/
# Copy the Neutron-compiled model
scp yolov8n_neutron.tflite \
root@"$BOARD_IP":/root/neutron_demo/
# Optional: copy the profiling-enabled model
scp yolov8n_neutron_prof.tflite \
root@"$BOARD_IP":/root/neutron_demo/
15. Verify the Files on the Board
# Connect to the board
ssh root@"$BOARD_IP"
# Enter the deployment directory
cd /root/neutron_demo
# Verify the models
ls -lh /root/neutron_demo/
# Check the driver
ls -lh /lib/libNeutronDriver.so
# Check the delegate
ls -lh /usr/lib/libneutron_delegate.so
# Check the firmware
ls -lh /lib/firmware/NeutronFirmware.elf
# Refresh the shared-library cache
ldconfig
# Verify that the delegate is visible to the loader
ldconfig -p | grep -i neutron
16. Check the BSP and Runtime Environment
# Display the Linux distribution and BSP information
cat /etc/os-release
# Display the kernel version
uname -a
# Search for Neutron-related kernel messages
dmesg | grep -i neutron
# Search for firmware-related messages
dmesg | grep -i firmware
# Locate the TensorFlow Lite benchmark application
find /usr/bin -name "benchmark_model*" -type f 2>/dev/null
17. Run the CPU Baseline
cd /root/neutron_demo
/usr/bin/tensorflow-lite-2.19.0/examples/benchmark_model \
--graph=yolov8n_quant.tflite \
--num_threads=4 \
--num_runs=50
Record the average inference latency, minimum latency, maximum latency, initialization time, and memory information reported by the benchmark.
18. Run the NPU Benchmark
cd /root/neutron_demo
/usr/bin/tensorflow-lite-2.19.0/examples/benchmark_model \
--graph=yolov8n_neutron.tflite \
--external_delegate_path=/usr/lib/libneutron_delegate.so \
--num_runs=50
Confirm that the benchmark output reports that the external delegate was loaded and that one or more model partitions were delegated.
19. Save Benchmark Results
# Save the CPU benchmark output
/usr/bin/tensorflow-lite-2.19.0/examples/benchmark_model \
--graph=yolov8n_quant.tflite \
--num_threads=4 \
--num_runs=50 \
2>&1 | tee cpu_benchmark.txt
# Save the NPU benchmark output
/usr/bin/tensorflow-lite-2.19.0/examples/benchmark_model \
--graph=yolov8n_neutron.tflite \
--external_delegate_path=/usr/lib/libneutron_delegate.so \
--num_runs=50 \
2>&1 | tee npu_benchmark.txt
# Review the saved results
cat cpu_benchmark.txt
cat npu_benchmark.txt
20. Calculate the NPU Speed-Up
Use the average latency reported by each benchmark:
Speed-up = CPU average latency / NPU average latency
Example:
CPU average latency = 100 ms
NPU average latency = 10 ms
Speed-up = 100 / 10
Speed-up = 10x
Required Deployment Artifacts
Artifact
Example File
Purpose
Neutron driver
libNeutronDriver.so
Communicates with the Neutron firmware and passes model buffers, weights, kernels, and input or output data.
Neutron delegate
libneutron_delegate.so
Connects TensorFlow Lite to the Neutron runtime and delegates supported NeutronGraph operations to the NPU.
Neutron firmware
NeutronFirmware.elf
Runs on the dedicated RISC-V core and executes the generated Neutron microcode.
Quantized TFLite model
yolov8n_quant.tflite
Provides the CPU baseline and serves as the input to the Neutron compiler.
Neutron-compiled model
yolov8n_neutron.tflite
Contains NeutronGraph operations generated for NPU execution.
Troubleshooting
Use the following table to identify common host, model, compilation, deployment, and runtime problems.
Area
Problem
Possible Cause
Recommended Solution
Host setup
SDK commands are not found.
The SDK bin directory is not included in PATH .
Run export PATH="$PWD/bin:$PATH" from the SDK directory. Add the absolute SDK path to ~/.bashrc if the configuration must persist.
Python environment
A required Python module cannot be imported.
The virtual environment is not active or the package was installed in a different environment.
Run source .venv/bin/activate . Verify the active interpreter with which python3 , and reinstall the missing dependency with pip install PACKAGE_NAME .
Model export
The expected yolov8n.tflite file cannot be found.
The exporter created a subdirectory or used a different filename.
Run find . -name "*.tflite" -type f . Update the following commands to use the actual exported model path.
Calibration
No calibration binary files are generated.
The image directory is incorrect or does not contain JPEG files.
Verify the directory with find ./coco/train2017 -name "*.jpg" | head . Pass the correct directory through the --images argument.
Calibration
The calibration tensor has the wrong shape or size.
The resize, batch dimension, layout, or data type is incorrect.
Confirm an NHWC tensor with shape 1 x 640 x 640 x 3 , RGB channel order, float32 data, and values normalized to [0, 1] .
Calibration
The quantized model produces inaccurate predictions.
The calibration preprocessing differs from inference preprocessing.
Verify letterbox resizing, padding color, RGB conversion, normalization, tensor layout, input size, and data type. Use representative images that match the intended application.
Profiler
The profiler reports an invalid or unknown input tensor.
The tensor name in --dataset does not match the model input name.
Inspect the model input details with the TFLite interpreter. Replace serving_default_args_0 with the exact name reported by the model.
Profiler
The profiler cannot read the calibration files.
The dataset path is incorrect, the folder is empty, or the binary format does not match the input tensor.
Verify the folder path, count the files, and confirm the expected number of bytes for each tensor.
Quantization
The quantized model still uses floating-point tensors.
The model was not fully quantized or the generated profile is incomplete.
Re-run profiling with valid calibration data. Inspect the input, output, and intermediate tensor data types before compiling the model.
Compilation
neutron-compiler fails.
The input model is invalid, not INT8, or contains unsupported quantization parameters.
Confirm that the input is the quantized TFLite model. Inspect its tensor types and quantization parameters, then run the compiler again with statistics enabled.
Conclusion
Congratulations! You have completed the end-to-end workflow for deploying and running an AI model on the eIQ Neutron-S NPU integrated into the FRDM i.MX 95 PRO.
Throughout this training, you learned how to prepare the Linux host environment, export YOLOv8n to TFLite, build a representative calibration dataset, quantize the model to INT8, and compile it for the i.MX 95 target. You also learned how to transfer the required runtime artifacts to the board and compare CPU and NPU inference performance.
This workflow is not limited to YOLOv8n. You can use the same process as a starting point for deploying your own computer vision models. However, each model must be evaluated individually because input formats, preprocessing requirements, quantization behavior, and operator support may differ.
Recommended Next Steps
Validate the accuracy of the INT8 model against the original floating-point model.
Review the compiler statistics to identify unsupported operations and CPU fallback sections.
Measure end-to-end application performance, including preprocessing, inference, and post-processing.
Test the workflow with your own model and a calibration dataset that represents your real application.
Use a profiling-enabled build to identify the most expensive layers and potential performance bottlenecks.
View full article