- NXP Forums
- Product Forums
- General Purpose MicrocontrollersGeneral Purpose Microcontrollers
- i.MX Forumsi.MX Forums
- QorIQ Processing PlatformsQorIQ Processing Platforms
- Identification and SecurityIdentification and Security
- Power ManagementPower Management
- MCX Microcontrollers
- S32G
- S32K
- S32V
- MPC5xxx
- Other NXP Products
- Wireless Connectivity
- S12 / MagniV Microcontrollers
- Powertrain and Electrification Analog Drivers
- Sensors
- Vybrid Processors
- Digital Signal Controllers
- 8-bit Microcontrollers
- ColdFire/68K Microcontrollers and Processors
- PowerQUICC Processors
- OSBDM and TBDML
-
- Solution Forums
- Software Forums
- MCUXpresso Software and ToolsMCUXpresso Software and Tools
- CodeWarriorCodeWarrior
- MQX Software SolutionsMQX Software Solutions
- Model-Based Design Toolbox (MBDT)Model-Based Design Toolbox (MBDT)
- FreeMASTER
- eIQ Machine Learning Software
- Embedded Software and Tools Clinic
- S32 SDK
- S32 Design Studio
- Vigiles
- GUI Guider
- Zephyr Project
- Voice Technology
- Application Software Packs
- Secure Provisioning SDK (SPSDK)
- Processor Expert Software
-
- Topics
- Mobile Robotics - Drones and RoversMobile Robotics - Drones and Rovers
- NXP Training ContentNXP Training Content
- University ProgramsUniversity Programs
- Rapid IoT
- NXP Designs
- SafeAssure-Community
- OSS Security & Maintenance
- Using Our Community
-
- Cloud Lab Forums
-
- Home
- :
- i.MX Forums
- :
- i.MX Processors Knowledge Base
- :
- i.mx8qm HDMI RX
i.mx8qm HDMI RX
- Subscribe to RSS Feed
- Mark as New
- Mark as Read
- Bookmark
- Subscribe
- Printer Friendly Page
- Report Inappropriate Content
i.mx8qm HDMI RX
i.mx8qm HDMI RX
4.14.98_2.3.0
since imx8qm hdmi rx isn't stable enough, so this document introduce how to enable HDMI rx simply, as far as I know, 4.14.98_2.3.0 is the most stable version right now, so first, build the 4.14.98_2.3.0 for imx8qm first, I built it on ubuntu 18.04
1 built the images
a) install the package
refer to the yocto user guide, don't forget install the package
one can refer to the 3.1 Host packages of yocto user guide, for ubuntu 18.04, let me remind, don't forget install the package as below:
$ sudo apt-get install gawk wget git-core diffstat unzip texinfo gcc-multilib \
build-essential chrpath socat cpio python3 python3-pip python3-pexpect \
xz-utils debianutils iputils-ping python3-git python3-jinja2 libegl1-mesa libsdl1.2-dev \
pylint3 xterm
b) setup the repo utility
$ mkdir ~/bin (this step may not be needed if the bin folder already exists)
$ curl https://storage.googleapis.com/git-repo-downloads/repo > ~/bin/repo
$ chmod a+x ~/bin/repo
export PATH=~/bin:$PATH
c) setup the project
$ mkdir imx-yocto-bsp
$ cd imx-yocto-bsp
$ repo init -u https://source.codeaurora.org/external/imx/imx-manifest -b imx-linux-sumo -m imx-4.14.98-2.3.0.xml
$ repo sync
d) build images
$ DISTRO=fsl-imx-xwayland MACHINE=imx8qmmek source fsl-setup-release.sh -b build-xwayland-imx8qm
$ bitbake fsl-image-qt5-validation-imx
2 download the images
after building the images, one can find all of images under imx-yocto-bsp/build-xwayland-imx8qm/tmp/deploy/images/imx8qmmek, for hdmirxfw.bin and hdmitxfw.bin, you also can find them under imx-yocto-bsp/build-xwayland-imx8qm/tmp/work/all-poky-linux/firmware-imx/1_8.4.1-r0/firmware/hdmi/cadence, I attached uuu script for downloading the images to the board by uuu, try to use hdmi in dtb file and add hdmirxfw.bin file
3 boot up the board with HDMI-IN
currently, not all of device can be used as hdmi-in for imx8qm, try to use laptop as hdmi in source, connect laptop with imx8qm J1 port and connect J6 port with HDMI display, when the board boot up, don't forget set fdt_file and image as your own image name, then you can find the log file like this:
4 test HDMI-IN
use the command:
gst-launch-1.0 v4l2src device=/dev/video4 ! autovideosink
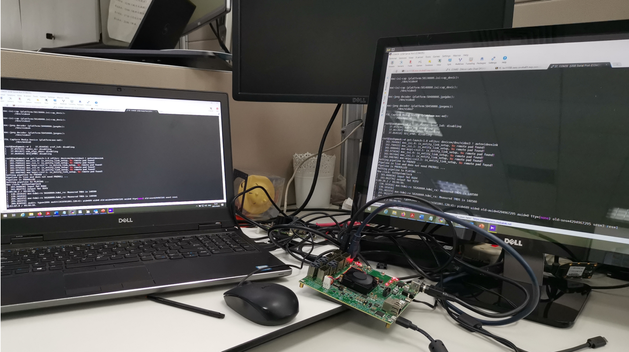
then one can see the hdmi display shows the same desktop as your laptop's
5.10.52_2.1.0
mx8qm HDMI RX feature had been tested on 4.14.98 bsp, but was dropped in L5.4.x BSP, now 5.10 BSP add this feature again
1 built the images
a) install the package
refer to the yocto user guide, don't forget install the packages
one can refer to the 3.2 Host packages of yocto user guide, for ubuntu 18.04, let me remind, don't forget install the package as below:
$ sudo apt-get install gawk wget git-core diffstat unzip texinfo gcc-multilib \
build-essential chrpath socat cpio python3 python3-pip python3-pexpect \
xz-utils debianutils iputils-ping python3-git python3-jinja2 libegl1-mesa libsdl1.2-dev \
pylint3 xterm
b) setup the repo utility
$ mkdir ~/bin (this step may not be needed if the bin folder already exists)
$ curl https://storage.googleapis.com/git-repo-downloads/repo > ~/bin/repo
$ chmod a+x ~/bin/repo
export PATH=~/bin:$PATH
c) setup the project
$ mkdir imx-yocto-bsp
$ cd imx-yocto-bsp
$ repo init -u https://source.codeaurora.org/external/imx/imx-manifest -b imx-linux-hardknott -m imx-5.10.52-2.1.0.xml
$ repo sync
d) build images
$ DISTRO=fsl-imx-xwayland MACHINE=imx8qmmek source imx-setup-release.sh -b build-xwayland
$ bitbake imx-image-full
2 enable the feature
a) Uboot setting
after checking the source code of imx8qm_mek.h under include/configs of u-boot-imx source code, one can find current uboot environment missed to set loading hdmi rx firmware, so add these in the imx8qm_mek.h, one can apply my patch named 0001-add-load-hdmi-rx-firmware.patch to support this
b) Uboot building
after applying the patch, one can use command as below to build the uboot again
$ bitbake -c compile u-boot-imx -f
$ bitbake u-boot-imx -f
The new uboot image is spl uboot image, if one don’t want to this, try the steps as below:
$ git clone https://source.codeaurora.org/external/imx/imx-mkimage
$ cd imx-mkimage/
$ git checkout lf-5.10.52_2.1.0
Refer to the user guide, I change the steps according to yocto building, of course one can build stand-alone the uboot and then build your own uboot image according to the chapter 4.5.13 How to build imx-boot image by using imx-mkimage of linux user guide:
- Copy u-boot-imx8qmmek.bin-sd from deploy/images/imx8qmmek/imx-boot-tools/ to imx-mkimage/iMX8QM/ and change the name to u-boot.bin
- Copy mx8qm-mek-scfw-tcm.bin from deploy/images/imx8qmmek/imx-boot-tools/ to imx-mkimage/iMX8QM/ and change the name to scfw_tcm.bin
- Copy bl31-imx8qm.bin from deploy/images/imx8qmmek/imx-boot-tools/ to imx-mkimage/iMX8QM/and change the name to bl31.bin
- Copy the SECO firmware container image (ahab-container.img) to imx-mkimage/iMX8QM/.
- Run make SOC=iMX8QM flash to generate flash.bin which is uboot demo images
c) kernel setting
one can find that current bsp doesn’t enable HDMI RX macro, so set
CONFIG_MHDP_HDMIRX=y and apply the kernel patch named L5.10.52_2.1.0_hdmirx.patch from SE team
Then build the kernel again:
$ bitbake -c compile linux-imx -f
$ bitbake linux-imx -f
3 boot up the board with HDMI-IN
Use uuu to download the uboot and kernel you built, one can use attached uuu script, don’t forget set imx8qm-mek-hdmi-rx.dts when the board boot up, then enjoy it
refer to the logfile as below, we can confirm that /dev/vide3 is HDMI RX device :
then use the command:
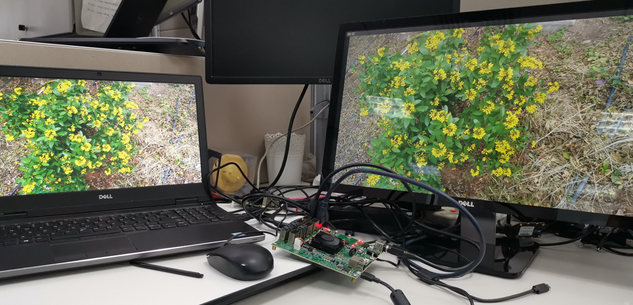
gst-launch-1.0 v4l2src device=/dev/video3 ! autovideosink
we got:
playback one video on the laptop:
- Mark as Read
- Mark as New
- Bookmark
- Permalink
- Report Inappropriate Content
Joan,great job!


